Installation · Version 3
Version 3 Install Wiring (MT3V)
Version 3 devices have an ID starting with MT3V and two screw antennas. This is not a DIY project -- professional installation is required.
Do NOT swap SIM cards between devices unless directed by Support.
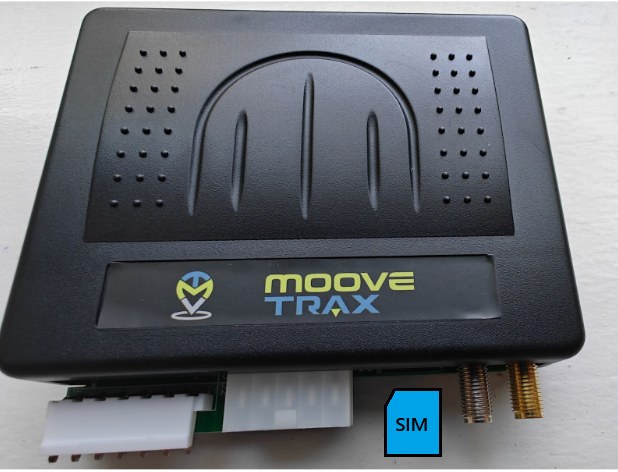
Installers use this link to test ALL functions after install. This link also keeps you in our database for future installs. (GPS ID is found under the gps)
Installer PortalInstall notes
- Version 3 has a built-in shock detector. For this to work, the device must be mounted on a solid surface that can detect shocks.
- Device and antennas should be hidden, but ensure signal is good -- you'll see signal when you log into the portal.
- Let the customer know which fuse they can pull to cut power to the device (to restart it).
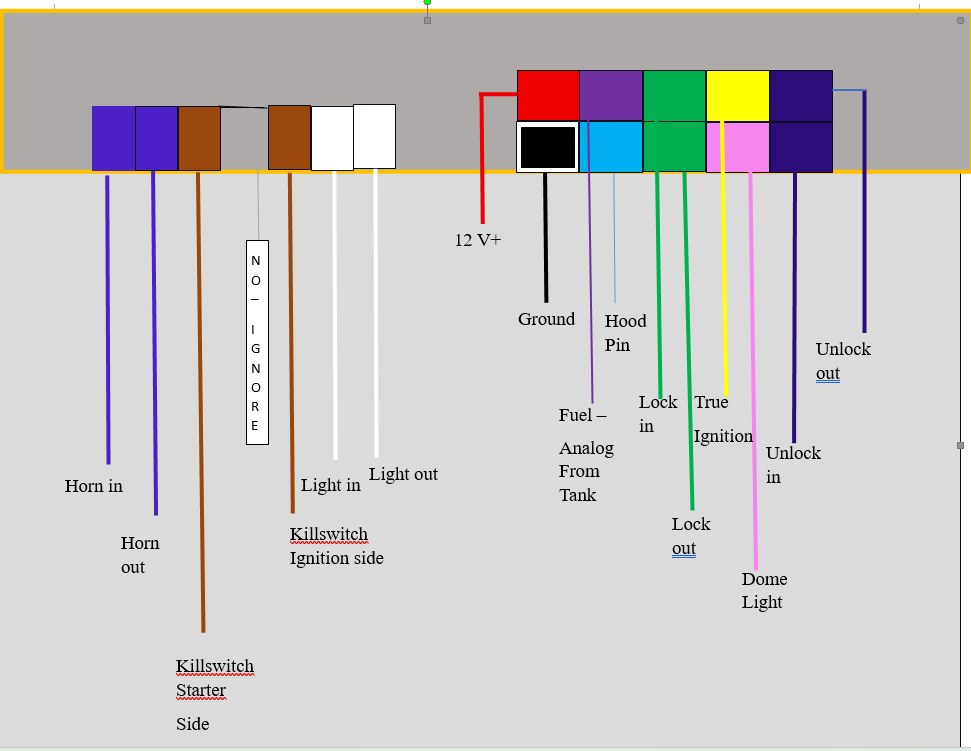
- Every function has an "In Wire" and an "Out Wire." Example, for a ground pulse for horn: ground one horn wire, and connect the other horn wire to the car.
- Dome and Hood can be positive or ground.
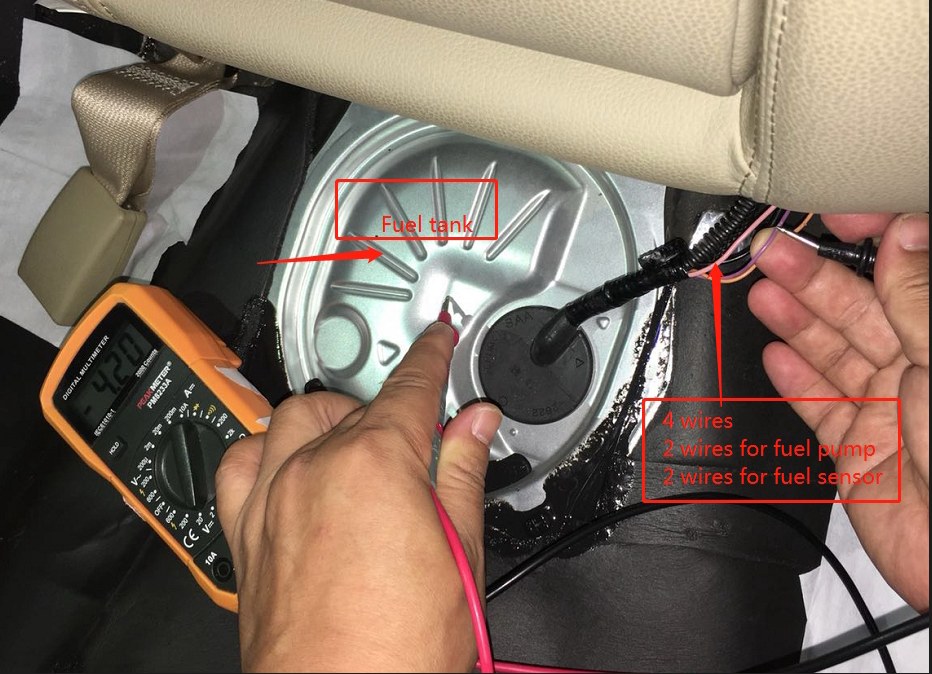
- Fuel needs to detect a variable voltage based on fuel level -- this is the fuel wire from the tank to the BCM, not the wire after the BCM. Ask the client if they need this feature.
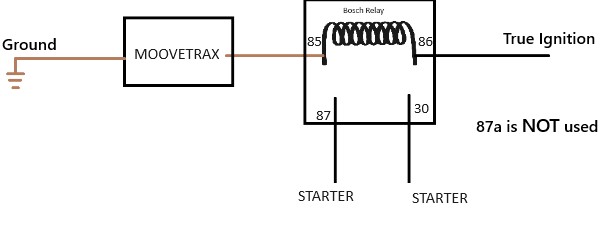
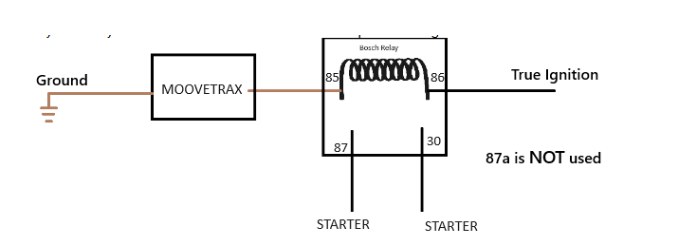
- Killswitch supports a maximum of 5 amps. If more than 5 amps is needed, or the car's wire is thicker than MooveTrax's brown wires, use an external relay (diagram below).
- Unlock should also disarm (double pulse is supported).
- Ensure you can lock by keyfob and unlock by MooveTrax -- use a bypass like Dbal if needed.
- Ensure a sleeping BCM does not affect unlock.
- All functions are already relay-isolated from each other and the brain.
- In and Out wires are interchangeable -- the device just bridges wires of the same color.
Full wire pinout
Finding the fuel level wire
To get the fuel level wire, find the wire whose voltage changes as fuel level changes -- usually at the fuel tank, not after the BCM.
If your killswitch needs more than 5 amps
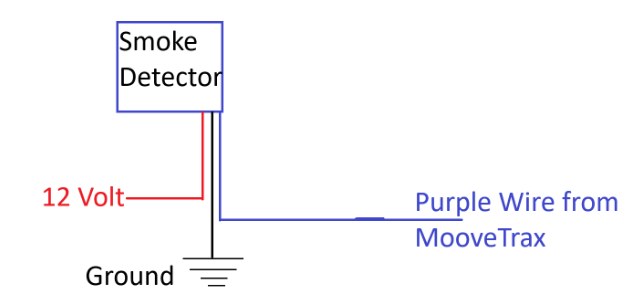
Smoke Detector
This smoke detector must be installed where smoke will actually reach it. After install, it must be calibrated while the car has no smoke -- this can be done from the installer portal or the user login.
This detector can be connected to ignition or to constant 12V:
- Connected to 12V: always uses power, always detects smoke.
- Connected to ignition: only uses power and detects smoke when the ignition is on.
To save battery, we suggest connecting to ignition -- but ask the owner what they prefer.
MooveTrax KS2 Relay-Like Tracker with OBD Plug
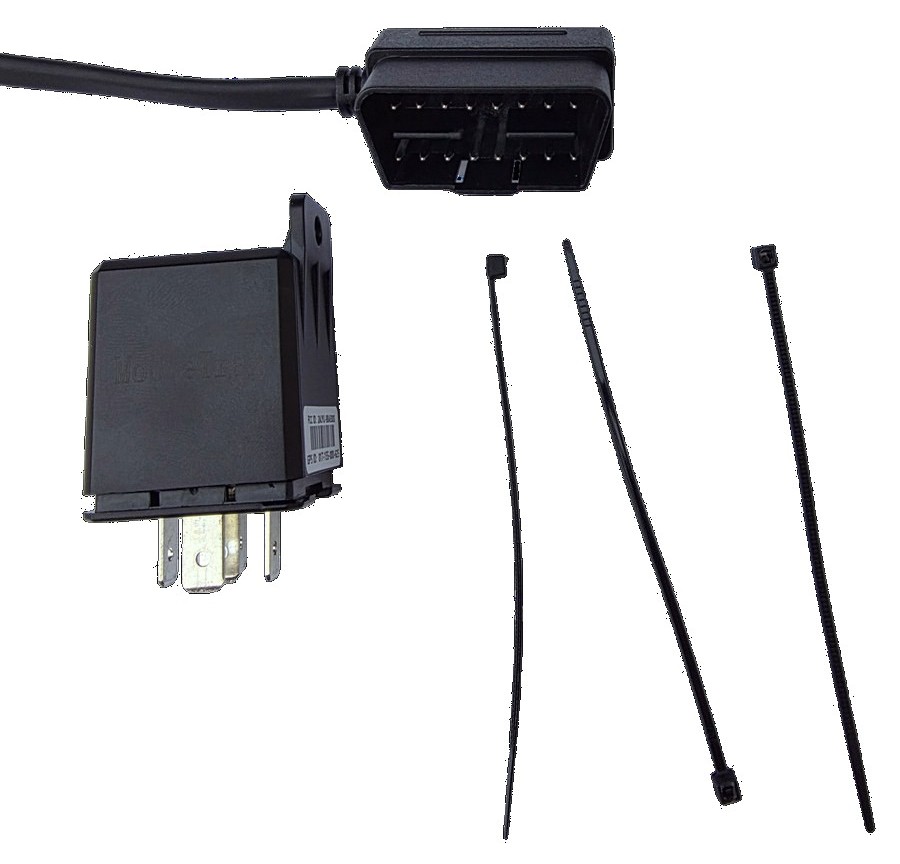
- Plug the tracker into the cable, then plug the OBD plug into the OBD port in your car.
- Start your car.
- Go to moovetrax.com/device-signup and fill out the information found in your white SIM pack.
- Follow the on-screen instructions.
To hardwire this tracker instead: unplug the OBD connector, cut the OBD plug out and discard it, then follow the hardwire schematics below.
MooveTrax KS2 Relay-Like Tracker (Hardwire)
Remove the SIM card by sliding the metal clip and take a picture of the numbers -- you'll need it for activation.
Device has to be activated by going to the Installer Portal. This will be successful after the device is on and outdoors.
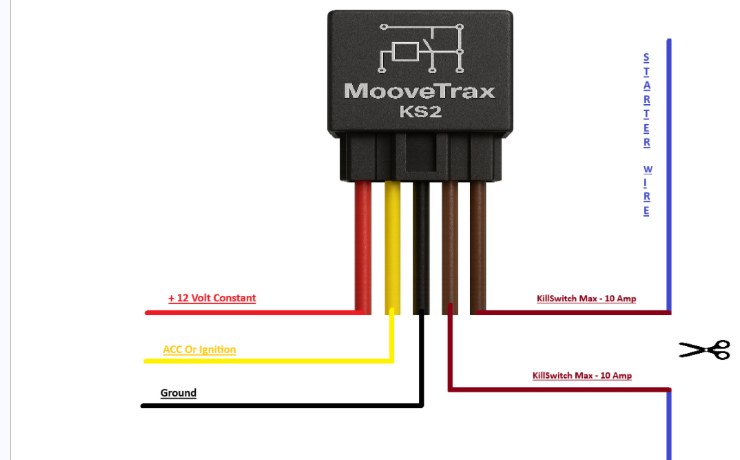
If the wire you cut in the car is smaller than MooveTrax's brown wire, you can connect both ends of your cut to the brown wires.
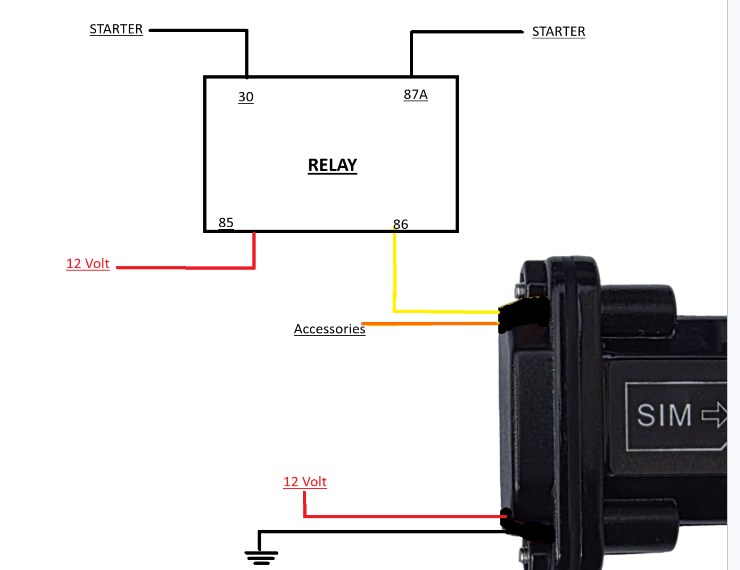
If your wire is bigger than the MooveTrax wire, use an external Bosch relay:
WP -- Waterproof Tracker
This tracker can be submersed in water and is ideal for motorcycles and ATVs.
After installation, the installer should log into the Installer Portal and test all functions. Killswitch can take 2 minutes to fully latch.
A Bosch relay is needed to connect the killswitch (not provided).
Troubleshooting FAQ
Green light not on
Power not on.
Green light fast flashing
Device is rebooting or SIM card is out -- put SIM in and wait 2 minutes.
Green light slow flashing
Device is trying to acquire satellite signal.
"Please wait 20 minutes" expires
Device must be online first -- put the device online and retry.
Should I cut the unlock wires in the car?
No -- you set polarity on MooveTrax. Please read the top part of the instructions.
Kill and Unkill are working in reverse
Your external relay is wired wrong -- pay attention to 87 and 87A.
Killswitch does nothing or works sometimes
Check your yellow wire -- it must have power before the killswitch works.
Car shows it is in the middle of the ocean
Ensure there is no metal or concrete between your square antenna and the sky.